Page photos & gallery
Upload a logo and business photos — the client's first impression of your page.
Photos are the first thing a client sees on your public page — before the price, before a free slot, before the specialist’s name. Mountify has two different kinds of photo, and they live in two different places: photos of the venue (logo and gallery) sit in Setup → Public site, while photos of an individual service live in that service’s own editor. This article covers the first kind.
There is no Save button. The moment a photo finishes uploading it is already live on your public page. If you aren’t ready for clients to see it yet, first switch off Online booking at the top of the same page.
1. Getting to the page photos
- In the left rail, pick the board whose page you’re editing — every board has its own public page and its own photos.
- Open the Setup hub.
- Choose the Public site row.
- Stay on the Site settings tab (the other tab, Embed, is for your own website).
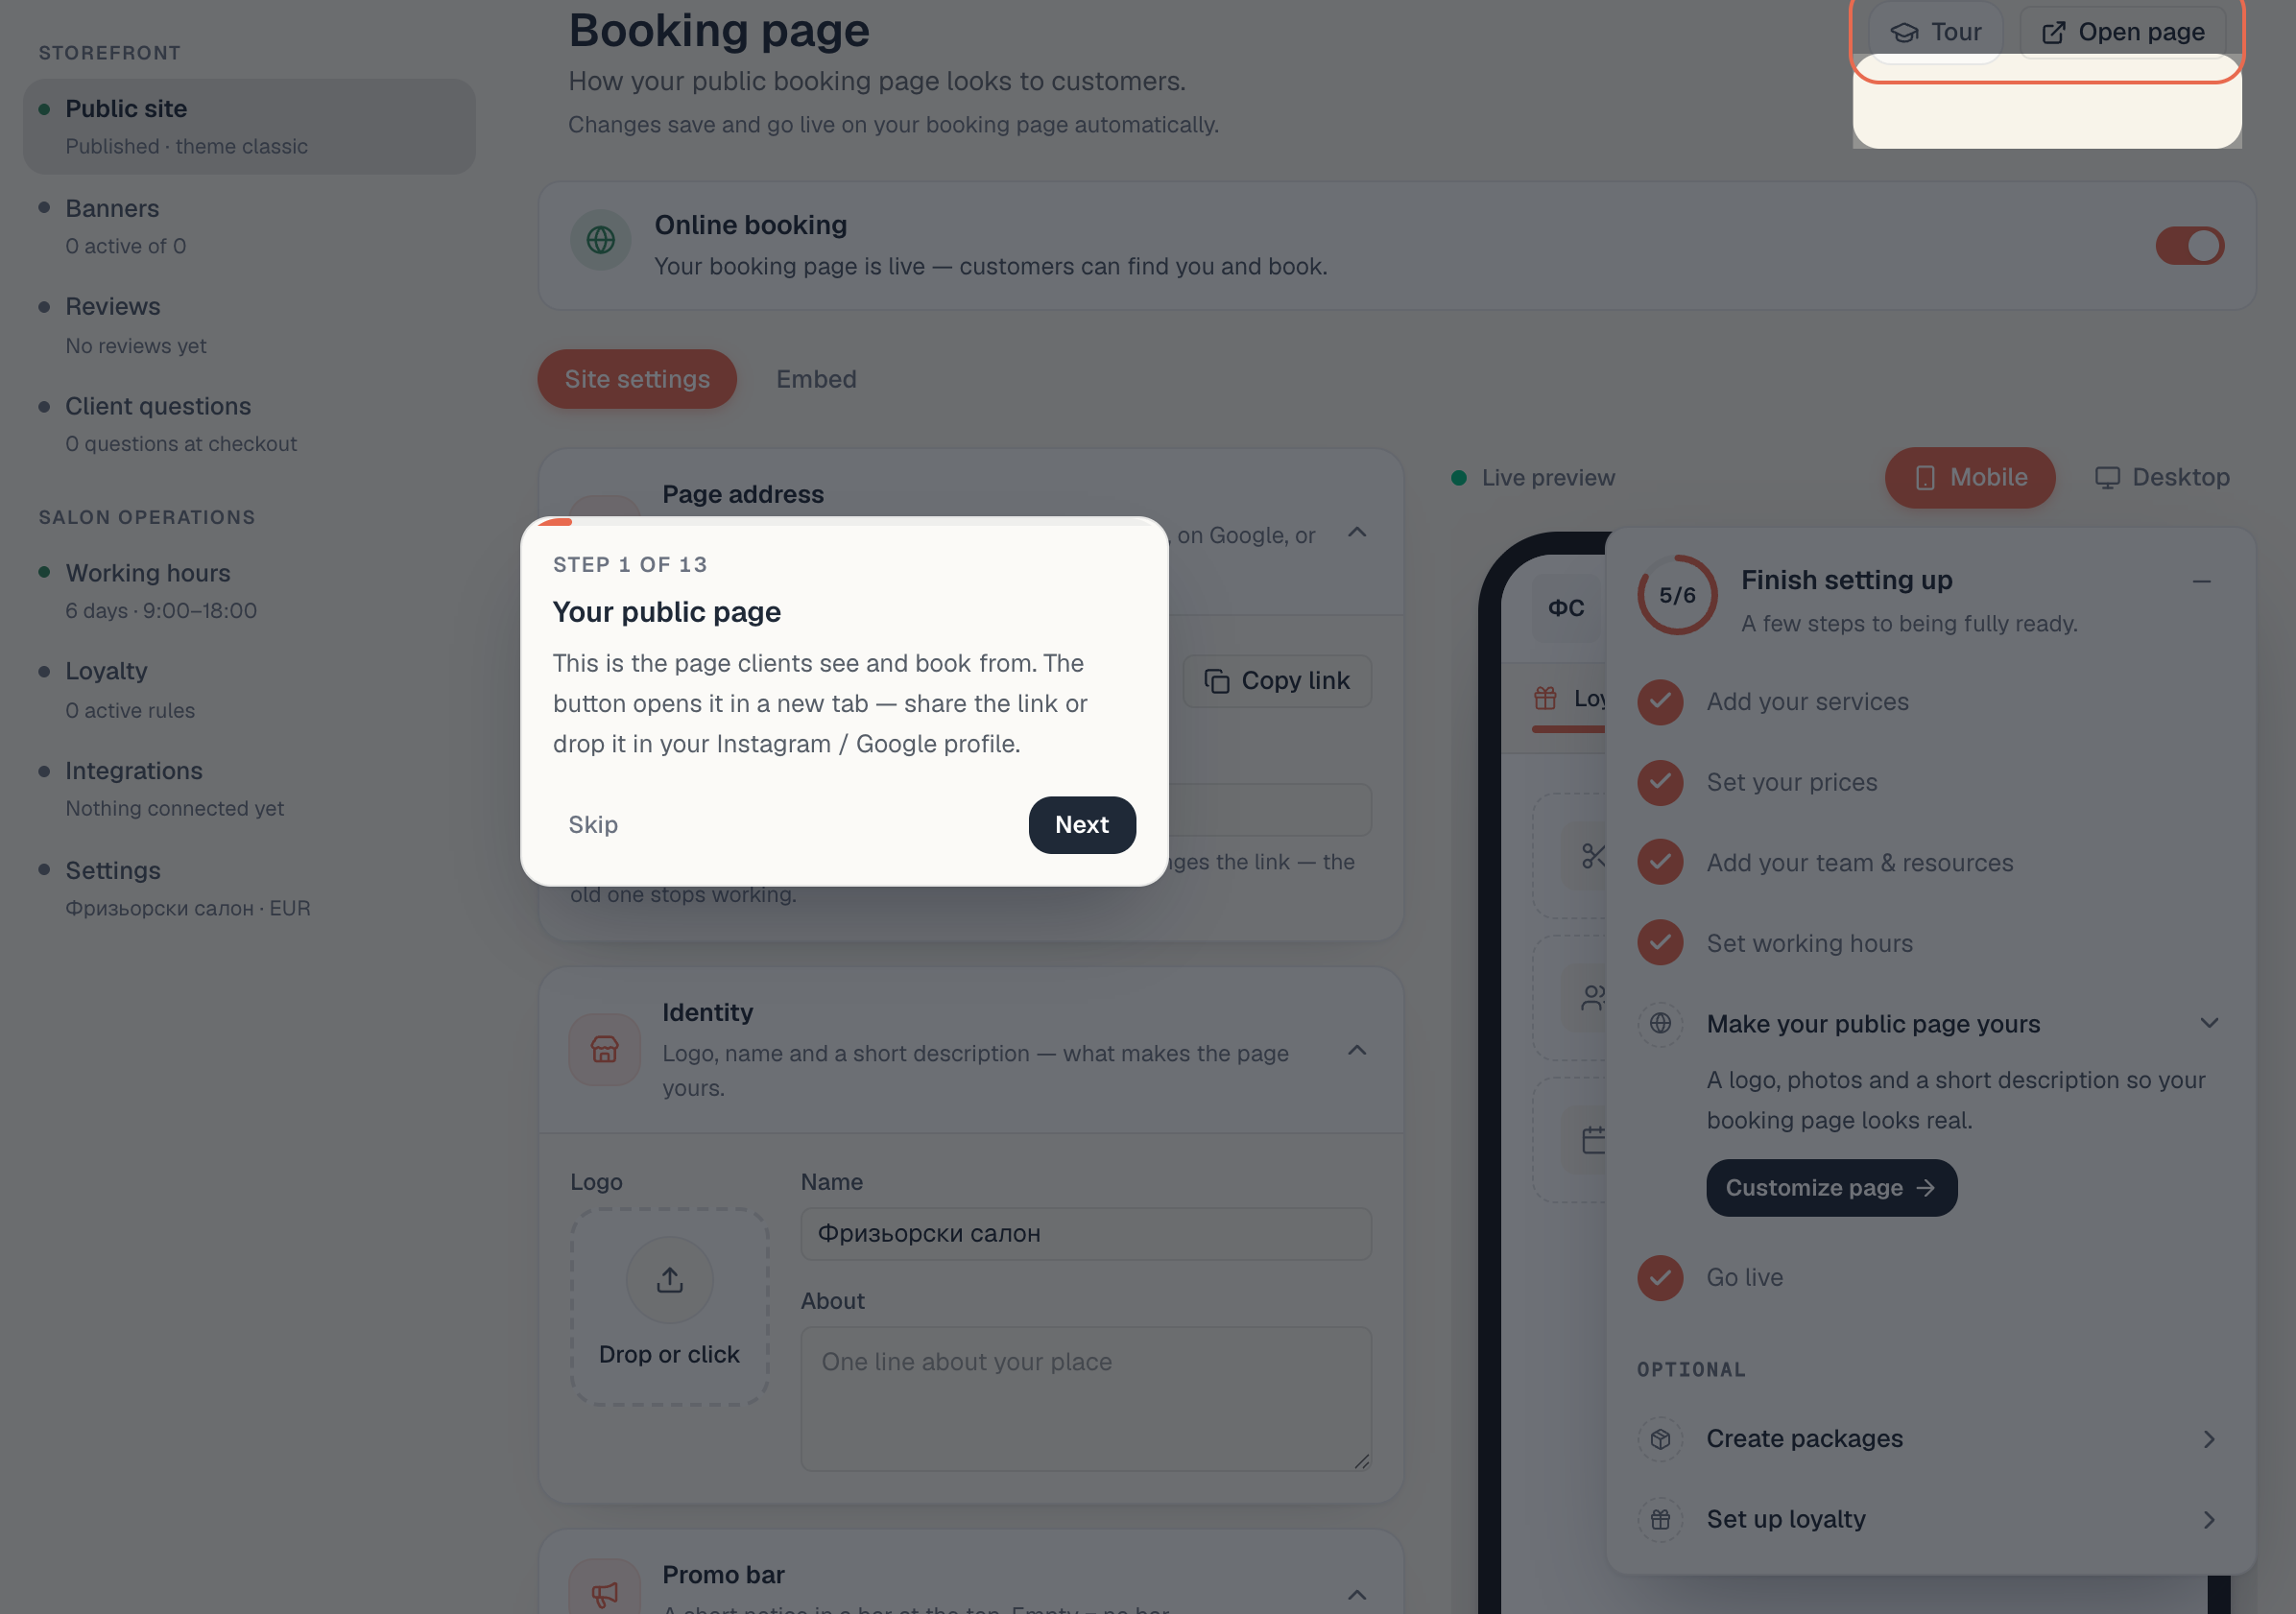
The full path is Setup → Public site. The screen’s heading is Booking page.
Settings sit on the left, a live preview on the right. On a narrow screen the preview drops out of the layout; use the Preview button at the top right to open it as a panel instead.
2. The logo — the Identity section
The logo lives in the Identity section, to the left of the Name and About fields. The dashed square is the upload field itself.
To upload:
- Click the square — or drag a file onto it.
- Pick the file from your computer or phone.
- Wait for the progress indicator. Once the image appears in the square it is saved, and the preview on the right updates immediately.
To replace or remove: hover over the uploaded image. Two buttons appear — Replace and Remove.
| Property | Value |
|---|---|
| Allowed formats | PNG, JPEG, WEBP, GIF |
| Maximum size | 5 MB per file |
| Recommended shape | square (the field is square and crops the rest) |
| Where it shows | above the page name, on the QR-code card, as an avatar in lists |
Logo shape (circle, rounded square or square) is not set here. It is further down, in the Components section, field Logo shape, with the values Circle, Rounded and Square. The default is Rounded.
Tip: upload a logo on a solid background rather than a transparent PNG with light lettering. If a client views the page in dark theme, a light logo with no background dissolves into it.
3. Photos of the venue — the Photos section
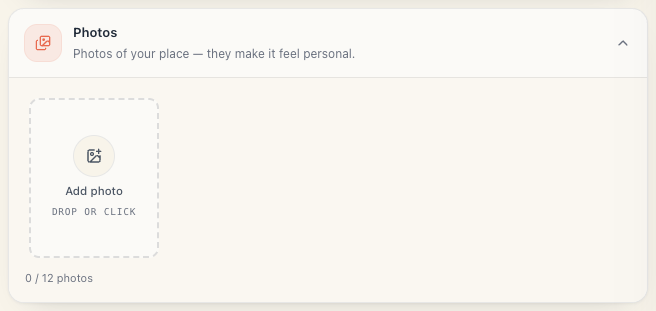
Further down the same column is the Photos section, described as Photos of your place — they make it feel personal.
It is a horizontal rail of tiles. Each tile is one photo; the last tile in the rail is the Add photo button, labelled Drop or click.
To add photos:
- Click the Add photo tile — or drag several files onto the rail at once.
- You can select more than one file. They upload one at a time, in the order you picked them.
- Under the rail a counter shows how many you have — for example 3 / 12 photos.
To remove a photo: every tile has a Remove button in its top-right corner. The number at the top left (01, 02, 03…) shows the order.
| Property | Value |
|---|---|
| Maximum count | 12 photos |
| Allowed formats | PNG, JPEG, WEBP, GIF |
| Maximum size | 5 MB per file |
| Tile proportion | portrait (taller than it is wide) |
| Order | upload order; to change it, remove and re-upload |
Messages you may hit
| Message | What it means | What to do |
|---|---|---|
| Gallery is full | you already have 12 photos | remove one to make room |
| File exceeds the maximum size | the file is over 5 MB | shrink the photo before uploading |
| This file type isn’t allowed | not PNG / JPEG / WEBP / GIF | re-save it as a JPEG |
| Workspace storage quota exceeded | the whole workspace is out of file storage | delete old files or change plan |
| You don’t have permission to upload here | your role can’t edit this board | ask the owner to grant it |
| Upload failed | a network problem | try again |
4. Which photo shows where
| Photo | Where it’s uploaded | Where the client sees it |
|---|---|---|
| Logo | Public site → Identity → Logo | at the top of the page next to the name; on the QR card |
| Venue photos | Public site → Photos | in the About panel — the first one as a large cover, the rest as a thumbnail strip below |
| Service photos | Catalog → Offerings → the service → its editor | on the service card and in its detail view |
| Specialist photo | Catalog → Resource kinds → the resource | in the specialist-picking step and in their profile |
The first gallery photo doubles as the cover of the About panel. If you want a different shot as the cover, remove the photos and re-upload them in the order you want — the first uploaded becomes first.
5. What photos do NOT do
- They don’t affect free slots, prices, durations or capacity.
- They aren’t used as a specialist’s photo — that is uploaded in the resource’s own editor.
- They aren’t used by banners. A banner has its own background image, uploaded in Setup → Banners.
- They don’t replace your address and phone. Those are set in Catalog → Locations; the Links section on the public site holds only social profiles and a website.
- They don’t create a separate “gallery” screen. There is exactly one place they render — the About panel.
6. Practical rules for good photos
- Landscape shots work better for the cover (it renders wide); portrait shots suit the thumbnails.
- Three to five photos are plenty. Twelve weak shots hurt more than three good ones.
- Shoot the interior, the working space and finished work — those are the three things clients look for.
- Avoid collages with text baked in: on a phone the text becomes unreadable.
- If a photo is dark, check how it looks in the Dark theme too — flip the Theme field in the editor and watch the preview.
7. Troubleshooting
I uploaded a photo but it isn’t on the public page. Reload the public page with a cleared cache (Ctrl+F5 / Cmd+Shift+R). Public data is cached briefly. If it’s still missing, check you aren’t on a different board — every board has its own gallery.
The logo is cropped. The field is square. If the original is a wide rectangle, the sides get cut. Make a square version with padding around the mark.
I can’t reorder the photos. Order is upload order and cannot be dragged. Remove everything after the photo you want first, then re-upload.
I closed the tab right after uploading and the photo is gone. An upload finishes when the tile appears in the rail. If you closed before that, the file never reached the board — upload it again.
I don’t have a Photos section. Check you aren’t on the Embed tab. Go back to Site settings.
What’s next
- Brand your page: logo, name, photos — the logo alongside name and description.
- Mood & theme — tuning colours so the photos stand out.
- Service photos & details — the other kind of photo.
- The booking-page editor — the whole screen, section by section.